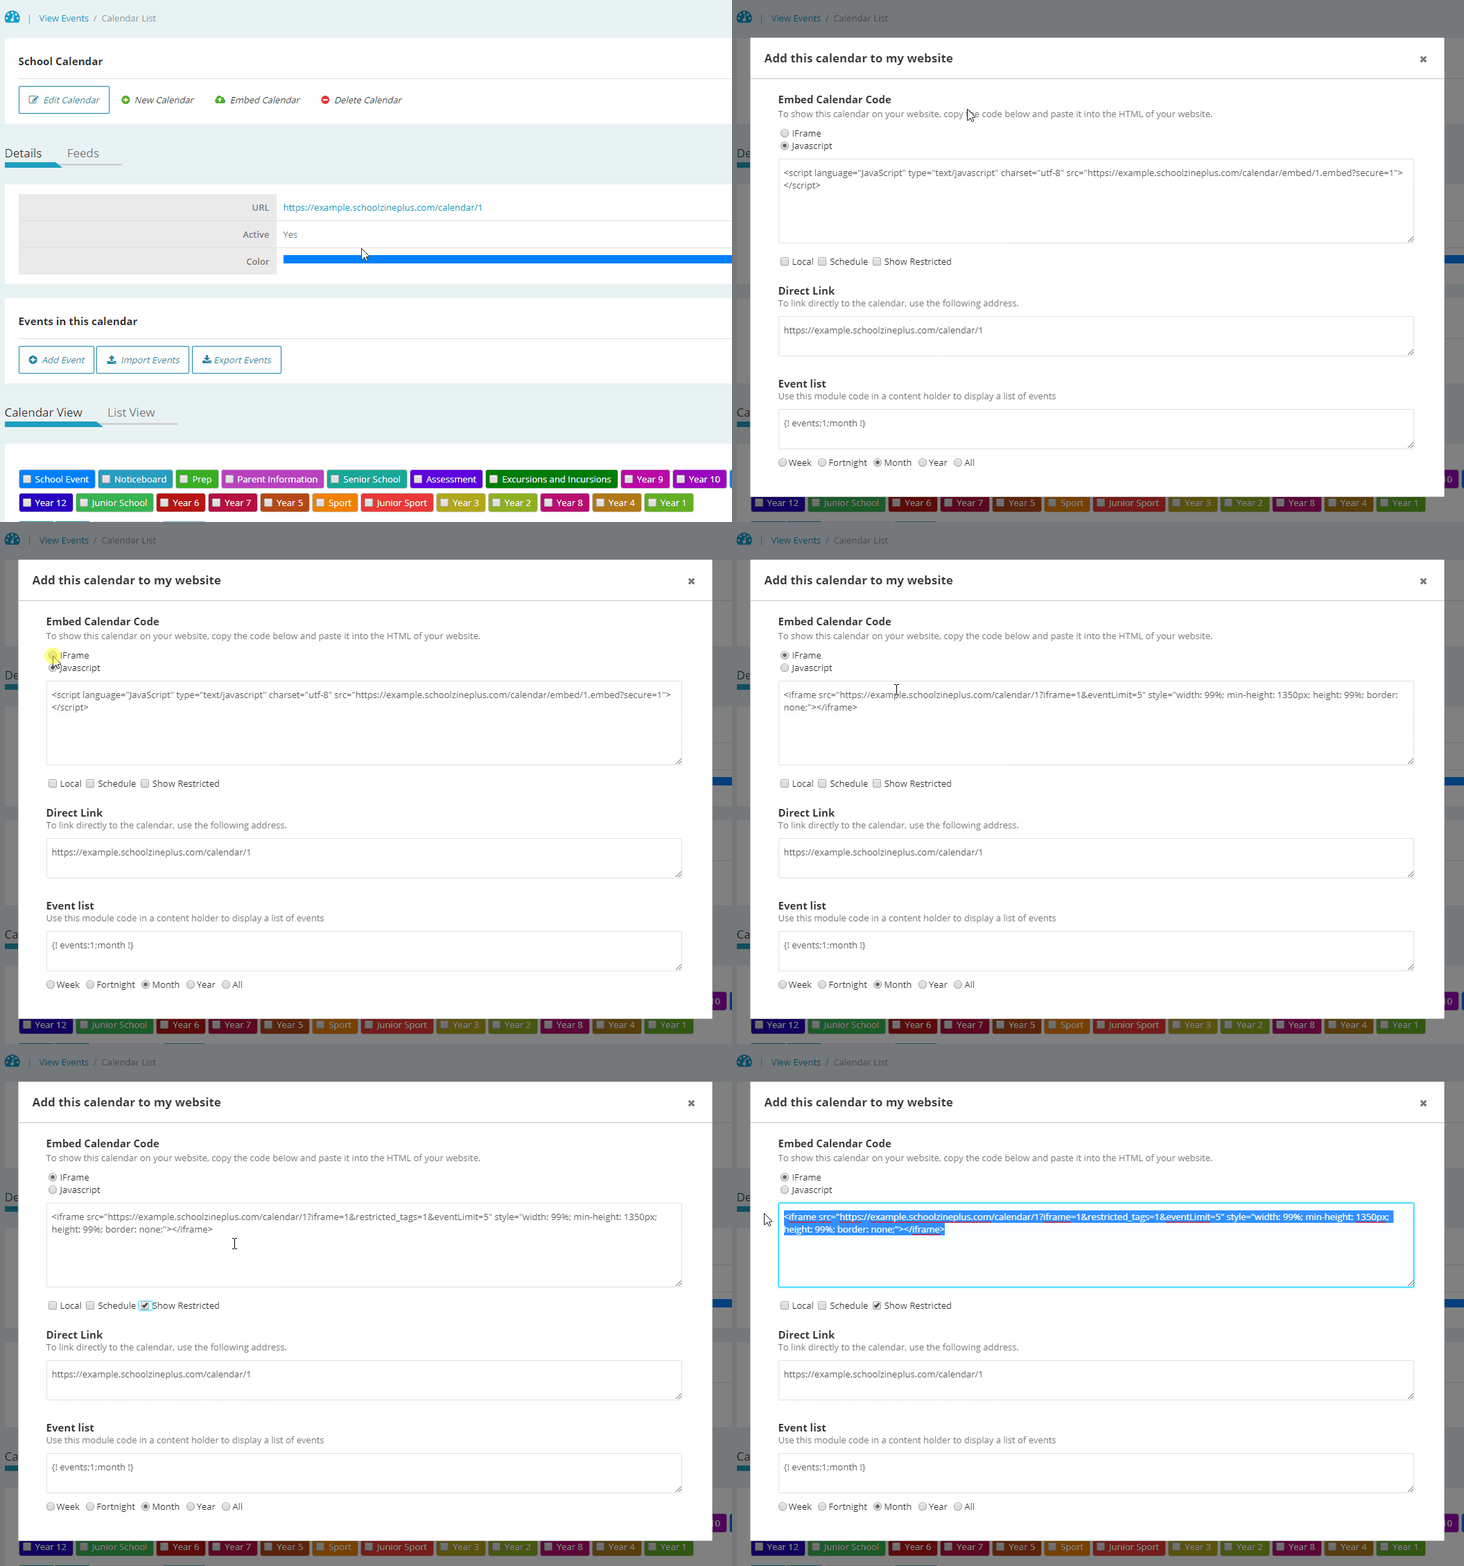
A Staff Calendar is a quick and simple way to allow you to show certain events only to your staff members. It makes use of the Restricted Tags feature to allow you to use only a single Calendar. This allows members of staff to view the Restricted Events, while hiding them on the Calendar’s public view.
Restricted Tags can be created via the Manage Tags Menu Item. A link to a full guide for creating Tags can be found below:
To create your Staff Calendar, follow the below instructions:
- Log in to your Control Centre and select the Settings tab
- Once expanded, select Calendar Settings
- Select your School Calendar
Note: This will happen automatically if your school is only using one Calendar - Select Embed Calendar at the top of the page
- Under the Embed Calendar Code section, select either the iFrame, or Javascript option
Note: This option will also allow you to add the calendar to an external website if you already have a page created
Both options are acceptable so use whichever option is preferred by your website provider
iFrame is recommended for use within the Schoolzine System - Click the Show Restricted check box
This will allow Events with a Restricted Tag to be visible on the page - Copy the code from the above box
- Navigate to your Staff Calendar Content Holder
Please see below for more information regarding creating Content Holders - Open the Source Code
- Paste your copied code into the Source Code box
Add Staff Calendar to SZapp Tile
- Log in to your Control Centre and select the Content tab
- Once expanded select Manage SZapp
- Select the Tiles tab
- Select the New Tile button
- Complete the required information
- Select the Add Existing Page button
- Select the Staff Calendar from the Web Page List
Supporting Guides
We recommend applying a password to your Staff Calendar Web Page to add extra security to the Calendar.


