
Importing a spreadsheet of events is useful for when you want to add multiple events at the same time. An example of this spreadsheet can be viewed here:
Click here for the Calendar Events Template
Preparing The Spreadsheet
The template file above has been created to assist with ensuring your data is imported correctly. This file contains data validation rules to restrict the input of any invalid formats. The fields in this file are explained below:
- Event Name – A free text field used for the Name of your event.
- Event Summary – A free text field for a brief description of your event.
- All Day – A ‘Yes’/’No’ field used to indicate if the event requires a Start and End time.
- Start Time/End Time – Fields used when an event has a specific Start and End time. (Data is in H:MM AM/PM format)
- Start Date/End Date – Fields used to indicate the Star and End Date of the event. (Data is in DD:MM:YYYY format and restricted to the end of next year)
- Tags – Uses a tag value to apply a Tag to the event. (Tag value can be found under Settings > Manage Tags)
- Location – A free text field to include a location for the event.
- Event Content – A free text field used to include more detailed information about the event.
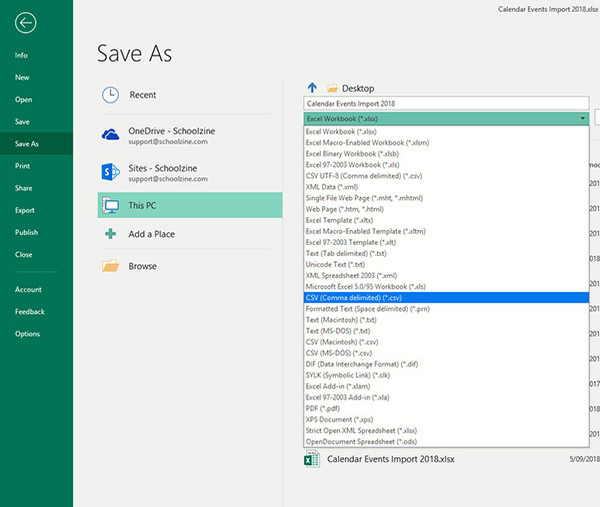
Now that your data has been added to the file it must be saved in CSV (Comma delimited)(*.csv) format.
- Click File towards the top left.
- Click Save As.
- Adjust the file format field to CSV (Comma delimited)(*.csv).
- Click Save.
Importing The Spreadsheet
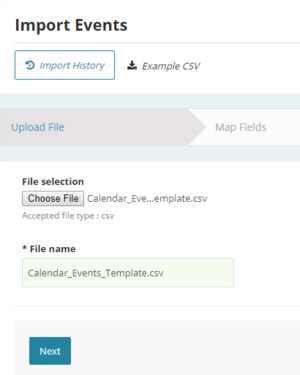
- Log in to your Control Centre and select the Events menu tab.
- Select the Import Events button at the top of the page.
- Select the Choose File button and navigate to where your file is saved.
- Click Next.
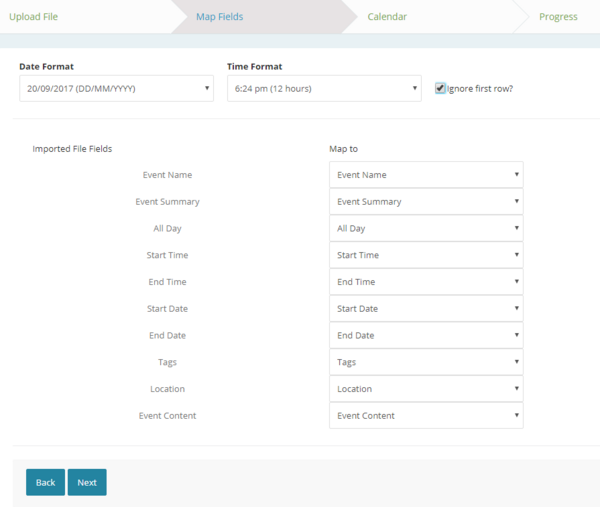
Map Fields
- The first row of your .csv file will automatically map to the relevant fields.
- Tick the Ignore first row? box.
- Click Next.
Calendar
- Select which Calendar/s you would like to import the events into.
- Click Import.
- A notification will appear to notify you of your imports’ success. We recommend double checking the Calendar to ensure all events are populating correctly.
- To review your import, click the View button, or the notification.
Export Events
- Log in to Control Centre and select the Settings menu tab.
- Once expanded, select Calendar Settings.
- If you are using more than one Calendar, click the view details button in the View column of the correct Calendar.
- Select Export Events.
- A file will download with a list of your events.