Preparing your Database
- Create an excel spreadsheet with the contact’s Email Address in one column. If you use SMS you may also include a Mobile Number in another column.
- Ensure there is only one email address per row.
- Save your spreadsheet as a CSV (comma delimited) file.
- Log in to your Control Centre and select the Contacts menu tab.
- Once open, select Remove.
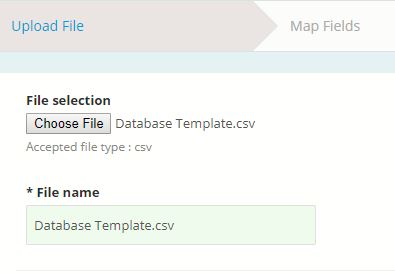
- Select the Choose File button and navigate to where your file is saved.
- Click Next.
Note: If your database is not saved as a CSV file, you will not be able to proceed.
Map Fields
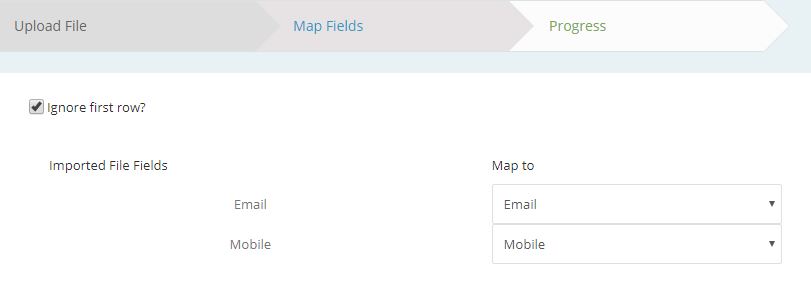
- The first row of your .csv file will automatically map to the relevant fields.
- Tick the Ignore first row? box.
- Click Next.
- A notification will appear to notify you of your imports’ success.
- To review your import, click the View button, or the notification icon.
Reviewing Your Import
- Log in to your Control Centre and select the Contacts menu tab.
- Once open, select Remove.
- Select the Removal Import History button at the top of the page.
Note: This will take you to an overview of all contact removal imports into the system, which includes total number of contacts imported and if there were any errors whilst importing. - Select the date to inspect a specific import.
- If there were any errors during the import, select View errors to see what they were.
Note: Many database errors are caused from common mistakes, such as a space in an email address or the @ symbol not being present. - Errors can be resolved by selecting the error under Note and then fixing and Resubmitting the contact or Discarding the contact.
Note: If you fix and resubmit the contact, the system will finish removing them.
Bulk Actions – Delete
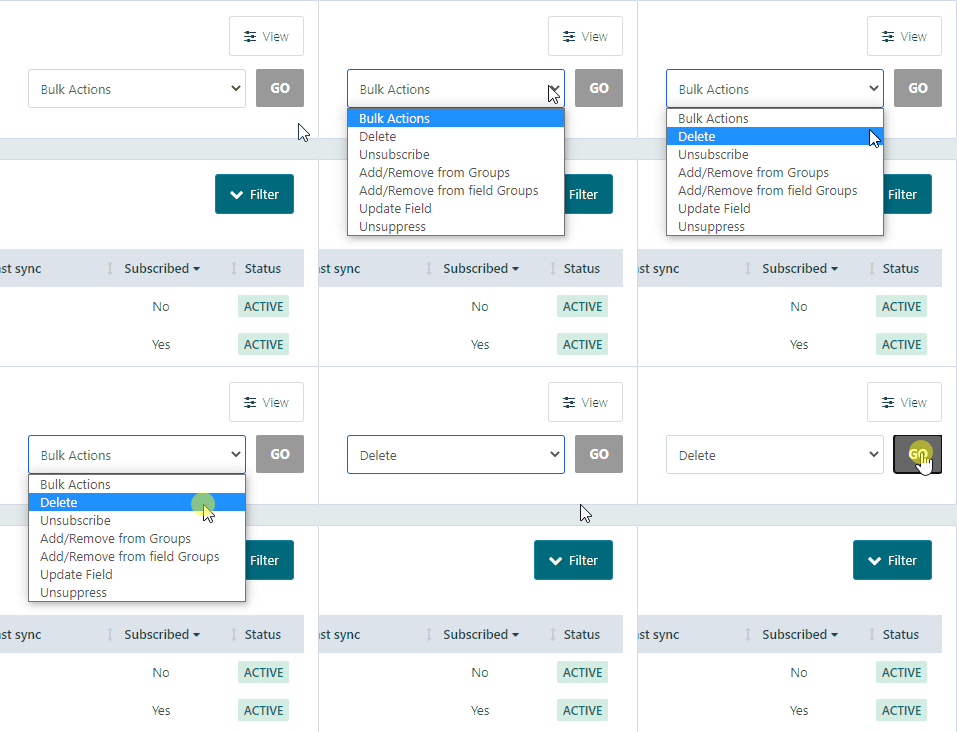
All contacts can be removed from an account quickly by using Bulk Actions.
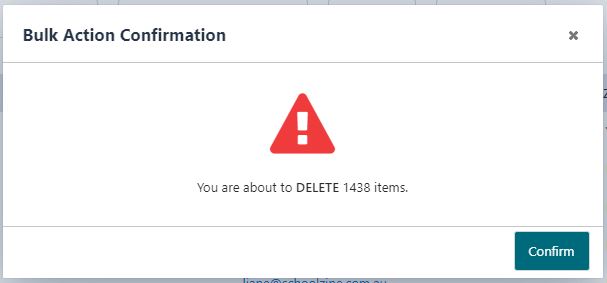
Bulk actions work by selecting a number of contacts, and it will apply this action to all selected items. However if NO items are selected, then the Control Centre will apply this action to ALL items.
Please note that when performing a Bulk Actions Delete action, this will not delete any Protected Users. Meaning your System Users will remain in the Control Centre.
Once you have removed all the old contacts, you can then use the Contact Import Guide to add your new list of contacts.
When performing a Bulk Actions Delete action, it is always a good idea to check the Form Records on the Subscription eForm to check for anyone who has subscribed themselves to your eNewsletter. This way if someone has subscribed themselves to your newsletter but are not on your records, you will still be able to have them added into the system after the deletion.


